カテゴリー
SugiBlog Webエンジニアのためのお役立ちTips

ナビゲーションバーのタイトルを変更

UINavigationControllerのタイトルを動的に変更することができます。
短いですが、メモ的に。

// タイトルをセット
self.navigationItem.title = "テストタイトル"

Xcode: 9.4.1
Swift: 3.3
OS: High Sierra 10.13.6

3,466 views

Swift 文字列を分割する

Swiftで文字列を分割して配列に格納する方法をご紹介します。
Foundationのインポートが必要です。

let myString: String = "2018/02/15"
var myArray: [String]
myArray = myString.components(separatedBy: "/")
2,506 views

Xcode 9 アップデートの対応

Xcode 9 Swift 4がリリースされたので、アップデートしてみました。
その際のマイグレーションについて参考になるかは分かりませんが、
私が開発しているアプリでの作業をメモしておきます。

今回のアプリはGoogleMapsとRealm、SVProgressHUDを使用したアプリですので
そのAPIパッケージもアップグレードする必要があります。

ターミナルでプロジェクトのディレクトリに移動します。

cd <path-to-project>

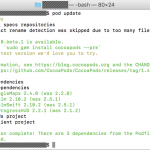
pod updateを実行します。

pod update

インストールしていたAPIがアップグレードされます。
iOSのターゲットを9.0としていたため、エラーが解消されなかったのでターゲットを10.0に変更しました。

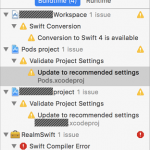
Xcodeでプロジェクトを開くと色々と警告が表示されていました。

ビルドしてももちろん通らないので、修正をしていきます。
続きを読む…»

3,433 views

UIViewのアニメーション

今回はUIViewやUIButtonをアニメーションさせる方法をご紹介します。

まずはアニメーションさせる適当なViewを作成します。

let sampleView = UIView()

sampleView.frame.size = CGSize(width: 120, height: 120)
sampleView.center = CGPoint(x: 60, y: 60)
sampleView.backgroundColor = UIColor.white
sampleView.layer.borderColor = UIColor.cyan.cgColor
sampleView.layer.borderWidth = 2

view.addSubview(sampleView)

作成したViewをアニメーションさせるにはUIView.animateメソッドを使用します。
ここでは大きさを変更してみましょう。
中心点も設定しているのは、大きさを変更すると左上を起点に大きさが変わってしまうためです。

UIView.animate(withDuration: 0.5, animations: {
    self.sampleView.frame.size = CGSize(width: 80, height: 80)
    self.sampleView.center = CGPoint(x: 60, y: 60)
}, completion: { Void in
    // アニメーション完了時の処理を記述します
})

次に、大きさと角丸の半径をアニメーションで変更してみたいと思います。
サンプルとして、標準カメラアプリの動画撮影ボタンのようなボタンを作成してみましょう。
実際の撮影処理はしていません。

まずは必要な宣言

let shutterView = UIView()
let shutterButton = UIButton()
var isRecording: Bool = false

Viewを作成するメソッドを作成します。

func makeShutterView() {
    shutterView.frame.size = CGSize(width: 74, height: 74)
    shutterView.center = CGPoint(x: 45, y: 45)

    let shutterCircle = UIView()
    shutterCircle.frame.size = CGSize(width: 76, height: 76)
    shutterCircle.center = CGPoint(x: 45, y: 45)
    shutterCircle.layer.borderColor = UIColor.white.cgColor
    shutterCircle.layer.borderWidth = 4
    shutterCircle.layer.cornerRadius = 38.0
    shutterView.addSubview(shutterCircle)

    shutterButton.frame.size = CGSize(width: 60, height: 60)
    shutterButton.center = CGPoint(x: 45, y: 45)
    shutterButton.backgroundColor = UIColor.red
    shutterButton.layer.cornerRadius = 30.0
    shutterButton.addTarget(self, action: #selector(onClickRecordingButton), for: .touchUpInside)
    shutterView.addSubview(shutterButton)

    view.addSubview(shutterView)
}

続きを読む…»

3,456 views

UISearchControllerの警告

UISearchControllerを使っていると、ViewControllerが破棄されるタイミングで以下のような警告が出てきました。

[Warning] Attempting to load the view of a view controller while it is deallocationg is not allowed and may result in undefined behavior (<UISearchController: ...>)

どうやらViewControllerが破棄されるタイミングでSearchControllerも破棄してやらないといけないようです。

以下のコードを追加したら解決しました。

deinit {
    searchController.view.removeFromSuperview()
}

また、実際に検索をして別画面に遷移した際に、UISearchControllerの表示が残ったままになる問題が発生しました。
キャンセルをタップすれば消すことができますが、それでは気持ちが悪いので解決させたい。
解決方法は遷移元のUIViewControllerのviewDidonLoadに以下の1行を追加するだけです。

definesPresentationContext = true

私の場合、原因はUINavigationControllerを使っていたことでした。

こちらで詳しく解説されています。
参考URL: http://qiita.com/color_box/items/d13b04a88587088019af

Xcode: 8.3.2
Swift: 3.1
OS: Sierra 10.12

1,776 views