カテゴリー
SugiBlog Webエンジニアのためのお役立ちTips

Swift 文字列を分割する

Swiftで文字列を分割して配列に格納する方法をご紹介します。
Foundationのインポートが必要です。

let myString: String = "2018/02/15"
var myArray: [String]
myArray = myString.components(separatedBy: "/")
2,506 views

Xcode 9 アップデートの対応

Xcode 9 Swift 4がリリースされたので、アップデートしてみました。
その際のマイグレーションについて参考になるかは分かりませんが、
私が開発しているアプリでの作業をメモしておきます。

今回のアプリはGoogleMapsとRealm、SVProgressHUDを使用したアプリですので
そのAPIパッケージもアップグレードする必要があります。

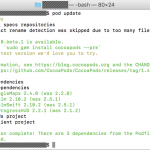
ターミナルでプロジェクトのディレクトリに移動します。

cd <path-to-project>

pod updateを実行します。

pod update

インストールしていたAPIがアップグレードされます。
iOSのターゲットを9.0としていたため、エラーが解消されなかったのでターゲットを10.0に変更しました。

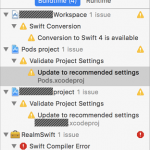
Xcodeでプロジェクトを開くと色々と警告が表示されていました。

ビルドしてももちろん通らないので、修正をしていきます。
続きを読む…»

3,433 views

iMessageステッカー「白目うさぎのビビ」

LINEスタンプをiOSで使えるiMessageステッカーに移植しました。

セリフなしのタイプなので、メッセージと一緒に幅広くお使いいただけます。


現在は非公開のため、AppStoreへのリンクは削除しました。(18/11/05)

940 views

UIViewのアニメーション

今回はUIViewやUIButtonをアニメーションさせる方法をご紹介します。

まずはアニメーションさせる適当なViewを作成します。

let sampleView = UIView()

sampleView.frame.size = CGSize(width: 120, height: 120)
sampleView.center = CGPoint(x: 60, y: 60)
sampleView.backgroundColor = UIColor.white
sampleView.layer.borderColor = UIColor.cyan.cgColor
sampleView.layer.borderWidth = 2

view.addSubview(sampleView)

作成したViewをアニメーションさせるにはUIView.animateメソッドを使用します。
ここでは大きさを変更してみましょう。
中心点も設定しているのは、大きさを変更すると左上を起点に大きさが変わってしまうためです。

UIView.animate(withDuration: 0.5, animations: {
    self.sampleView.frame.size = CGSize(width: 80, height: 80)
    self.sampleView.center = CGPoint(x: 60, y: 60)
}, completion: { Void in
    // アニメーション完了時の処理を記述します
})

次に、大きさと角丸の半径をアニメーションで変更してみたいと思います。
サンプルとして、標準カメラアプリの動画撮影ボタンのようなボタンを作成してみましょう。
実際の撮影処理はしていません。

まずは必要な宣言

let shutterView = UIView()
let shutterButton = UIButton()
var isRecording: Bool = false

Viewを作成するメソッドを作成します。

func makeShutterView() {
    shutterView.frame.size = CGSize(width: 74, height: 74)
    shutterView.center = CGPoint(x: 45, y: 45)

    let shutterCircle = UIView()
    shutterCircle.frame.size = CGSize(width: 76, height: 76)
    shutterCircle.center = CGPoint(x: 45, y: 45)
    shutterCircle.layer.borderColor = UIColor.white.cgColor
    shutterCircle.layer.borderWidth = 4
    shutterCircle.layer.cornerRadius = 38.0
    shutterView.addSubview(shutterCircle)

    shutterButton.frame.size = CGSize(width: 60, height: 60)
    shutterButton.center = CGPoint(x: 45, y: 45)
    shutterButton.backgroundColor = UIColor.red
    shutterButton.layer.cornerRadius = 30.0
    shutterButton.addTarget(self, action: #selector(onClickRecordingButton), for: .touchUpInside)
    shutterView.addSubview(shutterButton)

    view.addSubview(shutterView)
}

続きを読む…»

3,456 views

Ad Hoc配布する.ipaファイル作成までのプロセスメモ

Apple Developer Programにアクセスし、アカウントをクリックしてサインイン
https://developer.apple.com/programs/jp/

左メニューの「Certificates, IDs & Profiles」を選択

「Certificates」の「+」をクリックして証明書を作成
その際に必要なもの:.certSigningRequestファイル

.certSigningRequestファイルの作成方法
キーチェーンアプリを起動
[キーチェーンアクセス]-[証明書アシスタント]-[認証局に証明書を要求…]を
選択して必要事項を記入して作成

「Provisioning Profiles」の「Distribution」のプロファイルを「Ad Hoc」で作成
作成が完了するとDeveloper Provisioning Profile」ファイルをダウンロードできる
ダウンロード後、該当ファイルをダブルクリックするとXcodeに取り込まれる

「Identifiers」の「App IDs」でApp IDを登録

.ipaファイルのエクスポートはXcodeの[Product]-[Archive]から行う

参考URL:
http://akiyoko.hatenablog.jp/entry/2013/11/28/224536
https://i-app-tec.com/ios/ios-app-ids.html
http://joyplot.com/documents/2016/10/29/ios-app-id-manually/
https://i-app-tec.com/ios/ad-hoc.html
http://dev.classmethod.jp/smartphone/testflight-whole-process-2016-spring-01/

5,283 views